Part 1: Permissions for the S3 Bucket
To enable cross-account S3 bucket uploads, End Users need to configure a role with a policy allowing writes to the desired bucket and then share it with Explo. Explo will then assume the End User’s configured role to write data to the End User’s S3 bucket.Step 1: IAM Role in End Users AWS Account
This trust policy should be attached to the IAM Role in your End Users AWS account that you want the Explo account to assume:us-east-1 as that is the default:
us-east-1:arn:aws:iam::251497699814:rooteu-central-1:arn:aws:iam::266735830005:rootap-southeast-1:arn:aws:iam::897722681642:rootus-gov-east:arn:aws-us-gov:iam::184115685153:root
Step 2: IAM Role Permissions Policy
The role Explo assumes must have an IAM policy that allows actions likes3:PutObject and optionally s3:PutObjectAcl on the correct S3 path.
Attach this permissions policy to the role. It grants s3:PutObject and related permissions, but only for a specific prefix in the bucket:
your-bucket-name and specific/prefix/ with your actual bucket name and desired prefix.
Step 3: (Optional) S3 Bucket Policy (for additional security)
Sometimes the bucket itself restricts access further. In that case, the bucket owner (End Users) needs to attach a bucket policy allowing the IAM role to write to the prefix. If you want to enforce these permissions from the S3 bucket side as well, you can add a bucket policy like this:Part 2: Providing Explo with End User Information
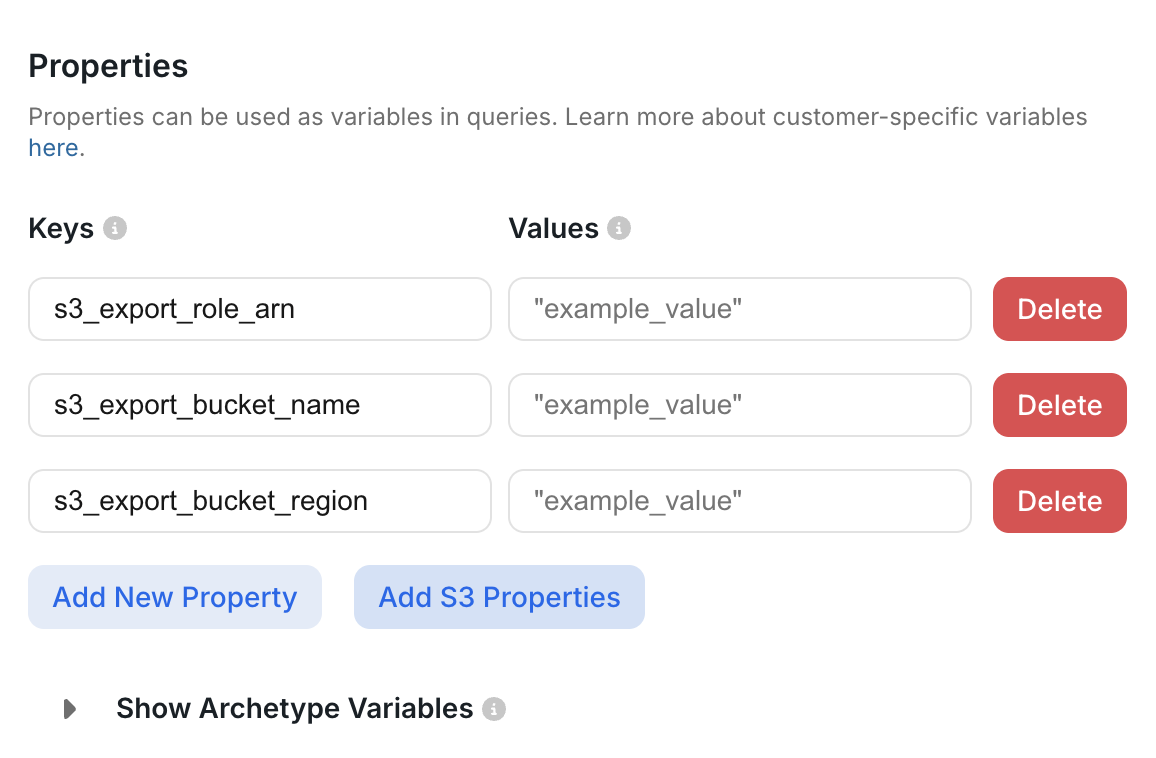
Explo Customer uploads ARN (Amazon Resource Name), S3 bucket information, and AWS Region for each of their customers S3 buckets to the user profiles in Explo. Each User will be able to have one S3 Bucket.Step 1. IAM Role ARN to Assume
You’ll need the full ARN of the IAM role in the target AWS account that Explo is allowed to assume. It looks like:Step 2. S3 Bucket Name and Prefix
You must know:- The bucket name, e.g.,
their-company-data - The prefix (folder-like path) you’re allowed to write to, e.g.,
uploads/your-team/
Step 3: Add S3 Bucket information to each customer profile
Once you’ve collected the Role Arn, Bucket name, and AWS Region from your end users you will add these as Key:Value pairs in the Customer’s profile: